While it is nice to be able to set your access point up and just use it, it is not always enough, especially in corporate environments, you may want to have a bit more security enabled.
One of the components that you may consider for part of this, is a radius authentication server. Sure you could install Radius on Windows and use that (in some shape or form) but Aruba has their own product that you can leverage. This is called Aruba ClearPass Policy Manager Server (CPPM for short). ClearPass allows you to centrally manage policies and automatically configure devices and distribute certificates as well as handling guest user access and device health. So I wanted to take a look at how it is deployed for a start. I should mention that although it is available as hardware, I will be using the virtual appliance for this, and I will be deploying it on vSphere 6.7. For version 6.9, version 7 is at the moment of writing this not yet available.
Prerequisites
You should have some things prepared before you deploy the appliance.
- Hostname
- Mgmt network settings (IP, Subnet, Gateway)
- Data interface network settings (IP, Subnet, Gateway). This part is optional and you should make sure to put the data network IP in a different Subnet from the management IP.
- Primary, Secondary DNS
- NTP Server (Optional)
The Appliance comes as a zip file and once downloaded you can expand it. Unlike other Aruba appliances, the ClearPass Server is shipped as an ovf and that means you need to include all the files in the folder that you expanded.
Deployment
So the deployment of the appliance is quite simple, only hostname is really required and choices for thin/thick storage, so I will pass through this just on a short note.

Select the 5 files from the zip file and press next.

Enter the name of the VM and select a VM folder if you have one.

Select Computer resource

Confirm details and click next.

Agree to the license Agreement
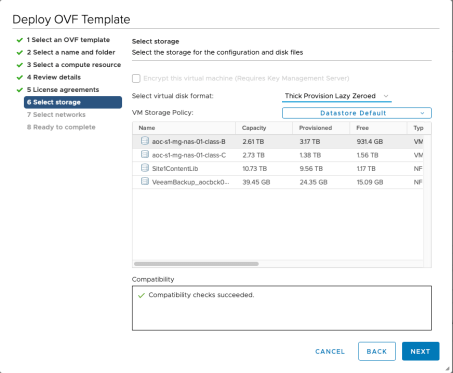
Select the storage and your preferred type of storage. It is recommended to use thick provision in a prod environment and also thick lazy zeroed.

Select Network settings, make sure to select two different Networks. This used to be a task for after the deployment, but Aruba has changed this in the mean time. So the first NIC is the Management, the second is for the data network, which you may not need. You must to have both adapters, whether you use the data adapter or not. They also both need to be left as connected.

Check that all is ok and click on finish. The appliance will now deploy. Wait for it to finish and then do not power it on.
Instead click on the new appliance and select edit and once the window open.

Click on “add new device” and select “New Hard disk”. This should be 500 GB in size. Click ok to add the disk.

After this, we can power on the appliance and let it boot, since this is a network device and we configured no network settings, you will need to connect via the VM console.
Anyway, now is a good time to make a break in this post, the initial configuration of the appliance continues here.