Configuring the smtp settings
You can configure vROps to send emails. This is useful for a number of reasons.
You can setup alerting via email, or you can use it to send reports to various line managers, business owners etc about the usage of their servers and so on, of course you can use it to create tickets in a ticketing tool for support also.
So let me show you how easy this really is. Apart from vROps, you will need an smtp server. I set one up in using a Windows Server with IIS installed . You can of course use linux also, and chances are if you are in a company, you have an email server.
Once you have logged into vROps, go to the administration tab, and find Management. Under Management, select “Outbound Settings”

Click on Add to add a new outbound feature.
Select Standard Email Plugin from the list:

You are presented with a new window with things to fill in such as instance name, which is the name use for selecting the email plugin elsewhere in vROps, smtp host, port, username if authentication is required, sender name and a recipient email for testing purposes:

Before pressing save, fill in an email on the last line and hit test.
You should get a test connection successful like here:

Press OK and then press save to save your connection, and you will see the new connection in your “Outbound Settings”.

Now that this is completed, lets have a look at some things that we can use this for.
Sending email alerts
Before we start on this I checked to see what alerts I have that are currently active in the Alerts overview screen. In my case I am going with an alert for the Network Insight adapter, which I know will generate an alert because the my vRNI server is offline.
To configure the sending of alerts in vROps is quite easy, you go to Alerts and then select the Notifications on the left.
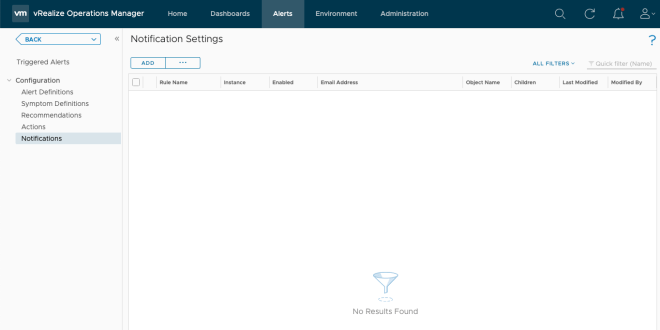
This opens up the Notification Settings where you can add/configure settings about Alerting.
First you select the Method, in our case email:

Next we select the email instance we created above:

Next you enter the email where you want to send it. You can select if you want to repeat the alert and how many notifications you want to send. If it is for a ticketing system, maybe you only want to send one, because else you get flooded with tickets. You can delay the notifications and optionally enter a Description.
Next select the Scope of the Alert. In this case it is an Object Type

For the Object type I selected “vRealize Network Insight Adapter”NI and selected the adapter instance.
Next, we must define what is the trigger. In this case it is an alert type.

And after this You need to select what type of Alert you want to notify for. I this case it is the application availability.

Finally at what criticality do I want to be notified? Well if the application is down or even the adapter in this case I want to be notified and consider it critical:

That is pretty much it. To test the alert, clear the alerts if active from the alerts screen and you should get an alert sent relatively quickly, which may look something like this:

The view details link at the bottom, takes you to vROps, of course.
Email reports
Just as you can do alerting via emails, you can also schedule reports to run and send them to Product owners, Business Managers and the likes. This can be useful because they can get reports on a schedule that suites their needs. If they need to run something ad hoc they can of course do this also but logging into vROps (if they have rights to do so) or raise a ticket for someone else with rights to run a report as a request.
To do this, inside vRops go to Environment and on the left, select navigate to the object you want to run a report on.

On the line where it says summary, to the right click on more and you should see Reports. Click on Reports and a wealth of reports will pop up:

A selection of Report templates pops up. Select the report you are interested in. I. my case I want the Executive Summary Report. You can search for it in the Filter on the right. once you hit enter you are left with the one report:

If you click on the 3 dots on the left of the report you should see the option to schedule the report, as seen below here:

A new window opens up and you can start filling in the settings.
You need to fill in time zone, time, start date, which day(s) of the week you want to run the report. In the second part you can select Email report. Here you enter the recipient of the report and which outbound rule to use. Again we select the smtp server settings we created int he first part of this post. For now the save to file-share is not important, I will cover it at the end of this post.

In my case I set it to just around the time where I was writing this in order to be able to test the report. It will of course be more useful to set it to run at Monday morning at 5 am or so to get the fresh data for the weeks meetings.
A few things about the report generation:
- The report will be generated at 5 am, not send at 5 am.
- You can set reports to run every 15 minutes.
- If you have more reports that generates around the same time, they are generated sequentially (Worth keeping in mind when scheduling if you have big reports).
Once it is running as it should you can go to the schedules underneath the report a window pops up where you can edit your schedule:

If you click on edit, then it opens the “Schedule Report” window again and you can adjust it to your needs.

In the end you get an email that looks like this, with a pdf inside, (note the state says completed, which means everything ran as it should):

When you open the pdf you get something like this (I took out the cover page, which you can customise to your own needs and to make it fit your corporate standards).

Store Report on file-share
I mentioned the file-share setting above, but for initial configuration that it was not important. I wanted to add it to the post also. Here is how you configure that part. (You can also disable email in case you prefer to just put the weekly report in a file-share).
To set that up you need to configure one more outbound setting. You do this in the same place as the smtp configuration, so under Administration –> Management –> Outbound Settings

NOTE: As far as I can see, you can not edit this after you create it. So if you need to change something you need to re-create it. I am not sure if this is a bug, since the smtp settings can be changed.
After adding that you can go to the schedule and edit it under Dashboards –> Reports –> Executive Summary Report –> Schedule –> Edit and edit the “Save to external location”. (Un-tick the “Email Report” in case you only want a copy to the file share).

Now wait until the report schedule runs again and you should find a file in the share you specified:

One final note that I suffered a bit from during this was, check what size of files you are allowed to send via email. IIS smtp server by default allows 2mb attachments, which in this case is too little. Once I changed that to a bigger number I got my reports.